RSLogix Micro is used for configuring the programmable logic controllers of the family 1000 and 1100, it works under Windows and has a very nice user interface and easy to use. Below the most common actions in the development of projects are shown:
New Files
The File→New option is used when you want to start a new project.
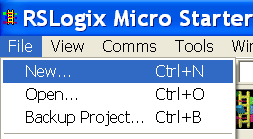
New File
Clicking on this option a dialog box appears to select the type of processor you will use in your application. To select a processor click it and then pressures OK.
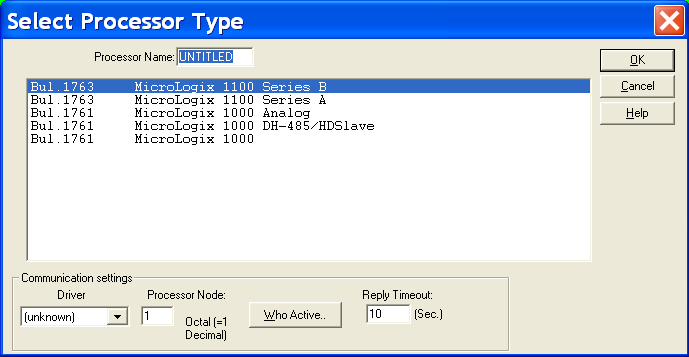
Select processor
Open files
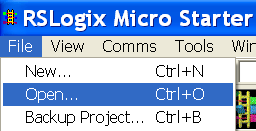
The File→Open option is used when you want to open an existing project. The file extension default is .RSS.
File open
Save a file in RSLogix Micro
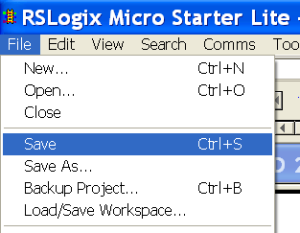
To save a file the File→Save option is selected. If it is the first time you save the project, you must provide a name for the file and provide the path to the folder where you want to save the file. RSLogix Micro save the file with a default extension .RSS.
File save
Verify el file
There are two verification options in the edit menu, Verify file that looks for errors on a specific program file and Verify Project that looks for errors throughout the project.
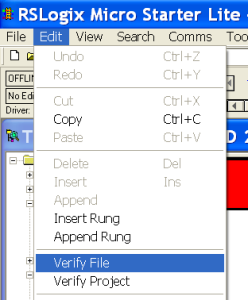
Verify
Communication with the processor/emulator. Upload, download, online.
The Comms→CommàSystem option allows communication with the processor or processor emulator.
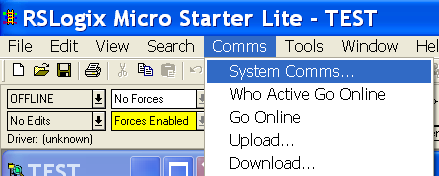
System comms
Use the dialog box “Communications” to indicate RSLogix Micro the driver to be used to communicate with the processor. The driver is configured in RSLinx.
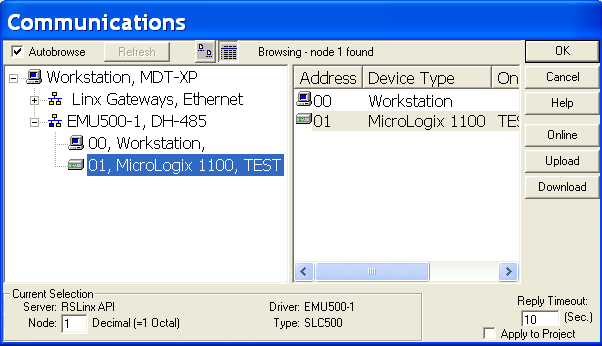
Communications
In the same dialog box are three buttons. The Online button, in the online mode the program shown is in memory of the processor; in the offline mode, the program shown is in computer disk. The Upload button copies the program in the controller’s memory to the computer’s memory. Download button copies the program in the computer’s memory to the processor memory.
Add Data Files
In a new project are created by default 8 files of data in the data memory controller. Each data file can contain up to 256 elements, but at the beginning contains only one item. When the program is developed it can be used all elements of the file, even without being created and the time when the program checks are automatically added. If desired they can also be added manually.
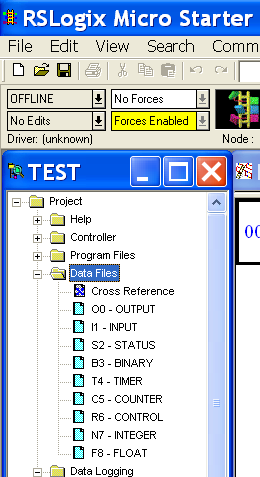
Data memory
It can create a new data file by clicking the right mouse button on the Data Files folder and then clicking New.
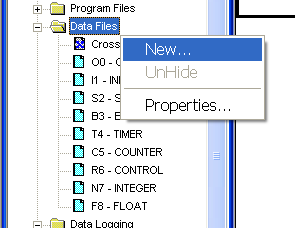
New data
The file number (RSLogix Micro suggests the next free) and the file type are then introduced. Optionally it can give a name, description and quantity of items in the file or the address of the last element.
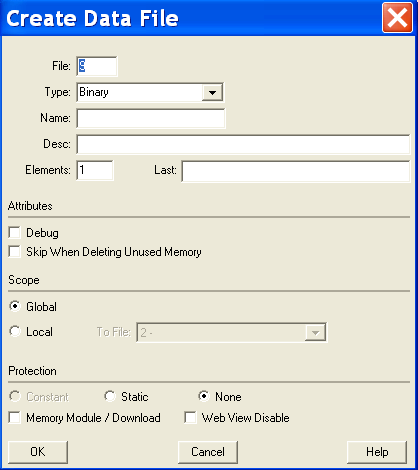
Create data file
Add program files.
In a new project, program memory containing 3 program files. Files 0 and 1 are reserved for the system and the file 2 is for program development. The files for the Micrologix families support only ladder diagrams. If you want to add a new program file is clicked with the right mouse button on the Program Files folder and then click on New.
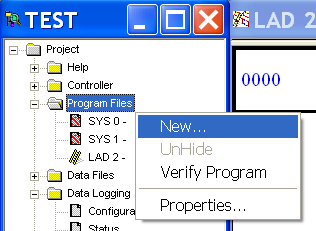
New Progam file
Finally write the file number and optionally it is given a name and a description.
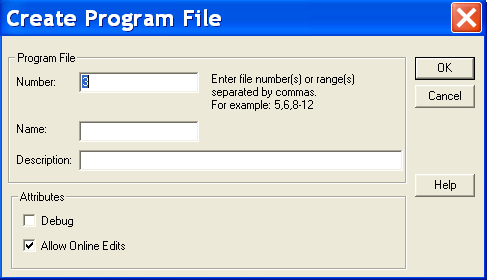
Create program file
Ladder Diagram. RSlogix Micro
In each program file are inserted lines, branches and instructions, this is done by dragging them from the instruction bar. Usually, the instructions have a data memory address associated.
In each direction, optionally, it can assign a description and a symbol. The description is a text of up to 5 lines and 20 characters per line. The symbol is a word up to 20 characters, which is an alias for the address. Once the symbol is defined, it can be written instead of direction. An example where you can observe how lines, instructions, branches, addresses, descriptions and symbols are inserted is shown in the following video.